Concert Photography Secrets: Pro Shots Without a Press Pass
Capturing professional-quality concert photos without a press pass is achievable by mastering lighting, understanding venue restrictions, and utilizing advanced camera techniques and prime lens selections to overcome common limitations.
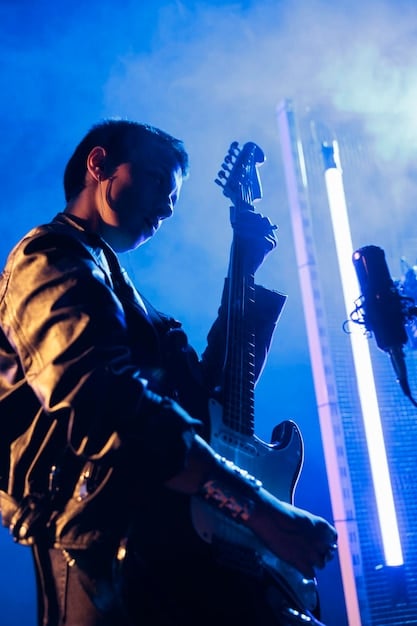
Ever dreamed of capturing the electrifying energy of a live concert, but felt held back by the lack of an elusive press pass? You’re not alone. Many aspiring photographers believe that professional-grade concert photos are only for those with official credentials. However, with the right techniques, gear, and a keen eye, unlocking Concert Photography Secrets: Capture Pro-Quality Shots Even Without a Press Pass is entirely possible for dedicated enthusiasts. This guide will equip you with the knowledge to navigate crowded venues, master challenging lighting, and create stunning images that truly encapsulate the magic of live music, all from the audience’s perspective.
understanding concert lighting dynamics
Concert venues present a unique and often challenging lighting environment. Unlike studio photography, you have little to no control over the light sources, which can range from intense spotlights to dim, rapidly changing colors. Understanding how these lights behave is crucial for anticipating shots and adjusting your camera settings accordingly. This section will delve into recognizing different lighting patterns and how to best react to them to achieve impactful images. Learning to read the stage lighting can significantly improve your hit rate, allowing you to capture moments that would otherwise be missed.
mastering exposure in low light
Low light is the most defining characteristic of concert photography. Your camera needs to gather as much light as possible, which means pushing its limits in terms of ISO, aperture, and shutter speed. Finding the right balance among these three elements is a continuous dance, and practice is key. High ISO settings introduce noise, wide apertures reduce depth of field, and slow shutter speeds can lead to motion blur. Being able to quickly adjust these on the fly will set your photos apart.
- ISO Sensitivity: Aim for the highest ISO your camera can handle without excessive noise. Modern cameras can often perform well at ISO 3200-6400, sometimes even higher.
- Aperture Priority: Shoot wide open (f/1.8, f/2.8) to let in maximum light. This often results in beautiful background blur, isolating your subject.
- Shutter Speed: A fast shutter speed (1/200s or faster) is essential to freeze motion. If the stage lighting is very dim, you might need to drop to 1/125s, but be prepared for some motion blur.
Beyond the technical settings, anticipating the light changes is an acquired skill. Watch for patterns: does the lead singer get a spotlight during the chorus? Is there a burst of strobes during the guitar solo? These moments are your cues to be ready. Over time, you’ll start to predict these shifts, allowing you to fine-tune your settings just before the perfect moment arrives. The goal is not just to expose correctly, but to expose creatively, using the light to enhance the mood and drama of the performance.
It’s also important to consider the color temperature of the lights. Concert lights are rarely white; they are often vibrant reds, blues, or greens. While your camera’s auto white balance does a decent job, shooting in RAW will give you the flexibility to correct or enhance these colors in post-processing. Embrace the colored lights – they are part of the concert’s ambiance – but know how to manage them.
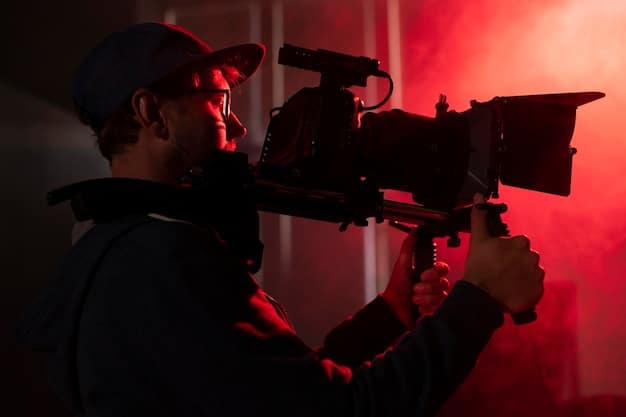
optimal gear choices for stealthy shooting
While a press pass might grant access to prime locations and specialized equipment, “stealthy” concert photography from the audience requires a different approach to gear. You’re looking for discretion, versatility, and performance in challenging conditions, without drawing undue attention or violating venue rules. This section explores camera bodies, lenses, and essential accessories that empower you to capture excellent shots from the crowd, focusing on portability and effectiveness.
camera bodies: balancing performance and size
The ideal camera body for concert photography without a press pass strikes a balance between low-light performance and a relatively compact size. You don’t want to be lugging around a massive setup that can hinder your mobility in a crowded space or attract unwanted attention from security. Mirrorless cameras are often a strong contender here due to their smaller footprint and excellent high-ISO capabilities. DSLRs, especially full-frame models, can also excel if you prioritize absolute image quality over discretion.
- Mirrorless Cameras: Brands like Sony, Fujifilm, and Canon offer full-frame or APS-C mirrorless cameras that perform exceptionally well in low light and are more discreet than their DSLR counterparts. Their advanced autofocus systems are also a huge plus.
- DSLRs (Full-Frame): Many photographers still prefer full-frame DSLRs for their robust build and often superior battery life. Models like the Canon 5D series or Nikon D800 series are workhorses, but they are larger and heavier.
- Avoid Built-in Flash: Never use your camera’s built-in flash at a concert. It’s distracting for performers and other audience members, and the light is usually harsh and unflattering.
Consider your budget and existing gear. Upgrading to a newer body with better high-ISO performance can make a significant difference. However, even older cameras can produce great results if paired with the right lenses and techniques. The key is knowing your camera’s limitations and working within them.
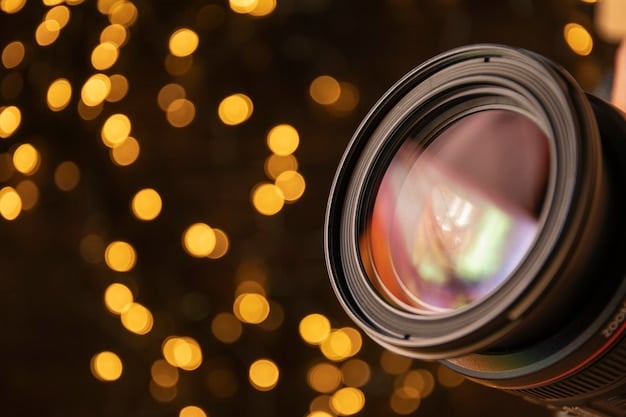
prime lenses: your low-light champions
Lenses are arguably more important than the camera body itself for concert photography. Fast prime lenses (those with a fixed focal length and wide maximum aperture like f/1.8 or f/1.4) are your best friends. They let in much more light than zoom lenses, allowing for faster shutter speeds and lower ISOs, which leads to cleaner images. While zoom lenses offer flexibility, their usually narrower apertures often struggle in dim concert environments.
When selecting lenses, consider your typical viewing distance and the type of shots you want to capture:
- 50mm f/1.8 or f/1.4: Often called the “nifty fifty,” this lens is affordable, compact, and incredibly versatile. It’s great for full-body shots or tighter portraits from a moderate distance. Its wide aperture is superb for low light.
- 85mm f/1.8 or f/1.4: An excellent choice for tighter headshots or isolating performers from further back. The bokeh (background blur) from an 85mm at wide aperture is beautiful.
- 35mm f/1.8 or f/1.4: Useful for wider shots, capturing more of the stage and audience interaction, particularly in smaller venues.
- Compact Telephoto Zoom (e.g., 70-200mm f/4): While f/4 is not ideal for very dark venues, a telephoto zoom can be useful if you’re far from the stage and need reach. Be mindful of its size and weight, and be prepared to push your ISO higher.
Always check venue rules regarding lens length. Some venues prohibit lenses over 3 or 4 inches in length for non-credentialed photographers. Opting for smaller, faster primes can help you stay within these guidelines while still delivering stunning image quality. A lens hood can also be helpful to reduce flare from stage lights, though discretion might sometimes mean leaving it off to keep your setup less conspicuous.
mastering camera settings for dynamic shots
Beyond understanding the gear, knowing how to configure your camera settings rapidly and effectively is paramount for successful concert photography. The ever-changing lighting and fast-paced nature of live performances demand quick adjustments. This section will guide you through optimizing your camera for speed, low-light performance, and capturing the decisive moment without a press pass.
shooting modes and autofocus techniques
While shooting in manual mode offers ultimate control, it can be challenging to manage in a concert’s dynamic environment. Aperture Priority (Av or A mode) is often a favorite among concert photographers. It allows you to set your desired aperture (wide open for maximum light) and ISO, while the camera automatically selects the appropriate shutter speed. This frees you to focus on composition and timing. If the shutter speed drops too low, you can manually increase the ISO or open up the aperture further.
For autofocus, continuous autofocus (AI Servo on Canon, AF-C on Nikon/Sony) is typically the best choice. This mode continuously tracks a moving subject, ensuring they remain in focus even as they move across the stage. A single autofocus point, positioned on the performer’s face or eyes, usually yields the best results. Utilize back-button focus if your camera supports it; this separates AF activation from the shutter button, giving you more control over when your camera focuses and shoots.
- Aperture Priority Mode (Av/A): Set your widest aperture (e.g., f/1.8, f/2.8) and let the camera manage shutter speed.
- High ISO: Don’t be afraid to push ISO 3200-6400 or even higher if needed. Noise reduction in post-processing can help.
- Continuous Autofocus (AF-C/AI Servo): Keep the subject sharp as they move on stage.
- Single Point AF: Position your focus point directly on the performer’s face or eyes for critical sharpness.
Consider shooting in burst mode (continuous high-speed shooting) during peak moments. Musicians move quickly, and a burst of shots increases your chances of capturing that perfect, sharp expression or a dynamic pose. However, be mindful of your buffer and card speed.
white balance and metering strategies
White balance can be tricky at concerts due to the colored stage lights. Setting your white balance to “Auto” might work, but often results in inconsistent colors. Experiment with setting a custom white balance if you have a moment, or embrace the artistic effect of the colored lights. Shooting RAW is incredibly beneficial here, as it allows you to adjust white balance precisely in post-processing without degradation.
For metering, “Spot Metering” or “Center-Weighted Average” can be useful. Spot metering allows you to measure the light on the performer’s face, ensuring their skin tones are correctly exposed, even if the surrounding stage is much brighter or darker. Center-weighted average can also provide a good balance if the performer is centrally located in your frame. Avoid “Evaluative” or “Matrix” metering, as these modes can be fooled by the extreme contrasts of stage lighting.
The faster you can adjust your settings, the better. Practice in dimly lit environments at home or at local, smaller shows to build muscle memory. Anticipation is key; watch the show, learn the flow of the set, and predict when the perfect photo opportunities will arise.
strategic positioning and venue navigation
Capturing great concert photos without a press pass often hinges on your ability to strategically position yourself within the crowd and navigate the venue effectively. Access to designated photo pits is off-limits, requiring you to become adept at finding unobtrusive yet optimal vantage points. This section focuses on tips for getting to the right spot, maintaining a clear line of sight, and being respectful of other concert-goers.
finding the best vantage points
Arriving early is perhaps the single most crucial tip for securing a good spot. The earlier you get there, the closer you can be to the stage, and the better your chances of a clear shot. Aim for spots near the soundboard or front of house mixing desk, as these locations often offer an unobstructed view of the entire stage without being too close for a wide-angle shot or too far for a telephoto. The side wings (left or right of the stage) can also provide unique angles, especially if a performer frequents one side.
However, “best” is subjective and can depend on the band’s setup, the venue’s architecture, and your preferred style of photography. Sometimes, a slightly elevated position, like a balcony (if available and allowed), can offer a comprehensive view of the stage and audience interaction.
- Arrive Early: Secure a good spot before the crowd swells.
- Mid-Front & Soundboard Area: Often provides balanced views.
- Side Stage (Wings): Look for unique angles and performer interactions.
- Elevated Viewpoints: Balconies can offer excellent overall stage shots, but check venue rules on cameras.
Be observant of the stage layout during opening acts. Where do the band members tend to stand? Where are the best light setups? Use this time to scout your preferred shooting lanes. Once you’ve found a good spot, try to hold it, but also be prepared to adapt if the crowd shifts or your view gets blocked.
respecting the audience and venue rules
This is paramount. You are a concert-goer first, photographer second. Your primary goal is to enjoy the show and allow others to enjoy it too. Do not push, shove, or block anyone’s view excessively. Keep your gear as compact as possible. A large camera bag or tripod will not only be a nuisance to others but also likely get you noticed by security.
Always check the venue’s specific camera policy before attending. Many venues have restrictions on professional-grade cameras (often defined by detachable lenses, or lenses exceeding a certain length). Some might allow “point-and-shoot” cameras but prohibit DSLRs. If you’re unsure, call ahead. If a venue has a strict “no professional cameras” policy, weighing the risk of bringing one is a personal decision; violating policies can lead to confiscation of gear or removal from the venue.
- Be Respectful: Don’t block views or disrupt others.
- Check Venue Rules: Always verify camera policies (detachable lenses, specified length limits).
- Minimize Gear: Travel light; avoid large bags or tripods that hinder movement or draw attention.
- No Flash: Never use a flash, it’s distracting and provides poor results.
Consider using a neck strap or wrist strap for your camera to prevent drops in crowded environments. A small, protective bag or pouch for extra batteries and memory cards is advisable. Ultimately, the more discreet and respectful you are, the less likely you are to encounter issues, allowing you to focus on capturing those special moments.
post-processing for that professional polish
Capturing the raw image is only half the battle in concert photography. Post-processing is where you can truly elevate your shots, transforming them from good to great. Without a press pass, you might not have had the luxury of perfectly controlled conditions, which means editing becomes even more critical to compensate for challenging lighting, high ISO noise, and less-than-ideal angles. This section explores essential editing techniques to bring out the best in your concert photos.
noise reduction and sharpening
High ISO settings are a necessity in low-light concert environments, but they inevitably introduce digital noise. Modern editing software like Adobe Lightroom, Photoshop, or Capture One offers powerful noise reduction tools. Apply noise reduction judiciously – too much can lead to a loss of detail and a “plastic” look. Typically, a combination of luminance noise reduction and color noise reduction is applied.
After noise reduction, your images might appear slightly softer. This is where sharpening comes in. Sharpening helps to define edges and bring back detail. Again, apply it carefully. Often, sharpening just the subject (like the performer’s face) can be more effective than sharpening the entire image, drawing the viewer’s eye to the most important elements.
Remember:
- Luminance Noise Reduction: Targets speckles of light/dark noise.
- Color Noise Reduction: Addresses colored blotches that appear at high ISOs.
- Selective Sharpening: Focus sharpening on key subjects to enhance detail without over-sharpening the entire image.
Many photographers prefer to apply noise reduction before sharpening in their workflow. Experiment with the sliders in your chosen software to find the sweet spot for each image, as different lighting conditions and ISO levels will require varying degrees of adjustment.
color correction and stylistic enhancements
Concert lighting often involves intense and varied colors – blues, reds, greens. While sometimes you want to preserve these as they are part of the concert’s vibe, other times they might be overwhelming or inaccurate. Color correction involves adjusting white balance, saturation, and vibrance to create a more pleasing or impactful image. If shot in RAW, you have immense flexibility to correct white balance accurately post-shoot.
Beyond correction, consider stylistic enhancements:
- Dehaze/Clarity: These tools can add punch and definition, especially helpful for cutting through atmospheric smoke or haze on stage.
- Split Toning: Use this to add subtle color to highlights and shadows, further enhancing the mood.
- Vignetting: A slight vignette can help draw the viewer’s eye towards the center of the frame, focusing on the performer.
- Black and White Conversion: Sometimes, a black and white conversion can transform a noisy, color-challenged image into a timeless, powerful photograph, simplifying the scene and emphasizing emotion and contrast.
Don’t be afraid to experiment with different looks. The goal is to enhance the emotion and energy you felt at the concert. Good post-processing isn’t about wildly altering the image, but subtly refining it to achieve its full potential. Develop a consistent editing style that becomes your signature.
ethical considerations and best practices
Navigating the world of concert photography without a press pass comes with an inherent responsibility to both the artists and fellow audience members. Adhering to ethical guidelines and best practices is not just about avoiding trouble with security; it’s about respecting the art, the venue, and the shared experience of live music. This section outlines crucial considerations to ensure you’re a responsible and well-regarded photographer, even from the crowd.
respecting artist rights and venue rules
The most fundamental rule is to always respect the artist’s intellectual property and the venue’s policies. While capturing personal memories is generally accepted, using images for commercial purposes without explicit permission (even if you own the photo) is a legal gray area and often prohibited. Most venues and artists have clear guidelines about photography – some allow non-flash photography with phones, others permit small digital cameras, and many strictly forbid professional setups without a pass.
It is your responsibility to familiarize yourself with these rules before attending. Ignorance is not an excuse. Bringing a long telephoto lens or setting up a tripod in the middle of a general admission area can quickly get you noticed and potentially ejected. Always prioritize the experience of the show for everyone, including the performers.
Key points to remember:
- Intellectual Property: Photos are for personal use; commercial use often requires permission.
- Venue Policies: Always check and adhere to camera restrictions (lens length, flash use, camera type).
- Discretion: Be as inconspicuous as possible with your gear to avoid drawing attention.
- No Tripods/Monopods: These are almost universally prohibited in crowd areas and can be a safety hazard.
Remember that security personnel are simply doing their job. If they ask you to put your camera away or to leave, comply respectfully. Arguing will only escalate the situation. It’s better to get a few good shots and stay for the whole show than to be ejected for violating rules.
audience etiquette and safety
Your presence as a photographer should never detract from another concert-goer’s experience. This means being mindful of your physical space, your equipment, and your behavior. Blocking someone’s view with your camera or continually holding it up can be incredibly frustrating for those behind you.
Here are some etiquette tips:
- Maintain Your Space: Avoid encroaching on others’ personal space just for a shot.
- Minimize Obstruction: If shooting over heads, keep your shots brief and lower your camera between bursts.
- No Flash Photography: This cannot be stressed enough. Flash is distracting for performers and ruins the ambiance for everyone.
- Be Aware of Surroundings: In crowded areas, keep an eye on your gear and avoid tripping hazards.
Furthermore, safety is paramount. Overly focusing on your camera can make you oblivious to crowd movements, potential jostling, or even stage-diving. Remain aware of your environment at all times. If you feel unsafe in a particular spot, move. Your safety and the safety of those around you should always take precedence over getting a perfect shot. By being a considerate and responsible attendee, you contribute positively to the concert experience for all, while still pursuing your passion for photography.
the art of stealth and patience
Capturing compelling concert photographs without a press pass is as much about skill and technique as it is about developing a mindset of stealth and patience. You are an observer, blending into the crowd, waiting for opportune moments rather than actively controlling them. This aspect of the craft truly distinguishes successful crowd photographers from those who might get frustrated by limitations. It’s about being prepared and present.
blending in and anticipating moments
To take great photos, you first need to be able to take photos. This means avoiding unnecessary attention. Dress in neutral, dark colors. Use a camera and lens setup that isn’t overly bulky or conspicuous. Avoid swinging your camera around wildly or attracting attention to yourself with loud shutters or movements. Think of yourself as a photographic ninja.
More importantly, cultivate patience. The entire show offers potential moments. Don’t feel pressured to shoot constantly. Instead, observe the performers, the setlist, the lighting cues, and the crowd’s energy. Anticipate when a musician might move to a certain spot, when a dramatic light change will occur, or when an emotional interaction might happen. These are the “decisive moments” that make for truly memorable photographs.
Strategies for blending in:
- Dress Discreetly: Dark, neutral clothing helps you blend into the background.
- Compact Gear: Opt for smaller cameras and prime lenses to minimize bulk and visibility.
- Silent Shutter Modes: If your camera has a silent or electronic shutter, use it to avoid disruptive clicks.
Use the downtime between songs or during less visually dynamic moments to check your settings, review your shots, and plan your next moves. This proactive approach ensures you’re ready when the magic happens, rather than fumbling with dials.
embracing imperfections and telling a story
Concert photography from the audience perspective often comes with inherent challenges: obstructed views, inconsistent lighting, and crowd interference. Instead of viewing these as insurmountable obstacles, learn to embrace them as part of the unique story you are telling. A hand reaching into the frame, the glow of phone screens, or the bokeh of other audience members can add context and authenticity to your images, highlighting that you were part of the experience, not just an outsider observing.
Some of the most powerful concert photos aren’t technically perfect, but they capture raw emotion, intense energy, or a unique perspective. Don’t discard a photo just because it has a bit of noise or a slightly soft focus if it tells a compelling story. Learn to see the beauty in these “imperfections.”
Consider:
- Contextual Elements: Use audience members, their hands, or phone lights to add depth and narrative.
- Emotion Over Perfection: Sometimes a powerful emotional moment trumps technical flawlessness.
- Unique Angles: Since you don’t have a press pass, find angles no one else will get.
Develop your unique style. What aspects of a concert do you want to convey? The raw energy of the band? The connection with the audience? The spectacle of the lights? By focusing on your personal vision and combining it with stealth and patience, you can consistently capture “pro-quality” shots that genuinely reflect the live music experience, even without that coveted press pass.
advanced techniques for creative impact
Beyond essential settings and positioning, embracing some more advanced photographic techniques can significantly elevate your concert images, helping them stand out from the crowd. These methods often require a deeper understanding of your camera and a willingness to experiment, but the results can be truly stunning, showcasing your unique artistic flair even without traditional access.
intentional motion blur and light trails
While normally we strive to freeze motion, sometimes intentional motion blur can convey the frenetic energy of a live performance. By purposely using a slower shutter speed (e.g., 1/30s or 1/60s) and panning with a moving performer, you can achieve a sharp subject against a streaked background, emphasizing speed and dynamism. Alternatively, longer exposures (if you can stabilize your camera against a railing or body, as tripods are usually forbidden) can turn moving lights into abstract, colorful trails, adding an artistic dimension to your shots.
This technique is challenging and requires practice to master, often resulting in many unusable shots for every successful one. However, when it works, it can be incredibly impactful. Look for performers who have predictable movements or steady light sources.
Think about:
- Panning Shots: Use a slower shutter speed (e.g., 1/30s) and follow a performer’s movement to blur the background.
- Light Streaks: Slightly longer exposures (e.g., 0.5-1 second) can turn moving stage lights into abstract streaks.
- Stability: Brace yourself or lean against a railing for maximum steadiness during slower shutter shots.
Experimentation is key here. What works for one song or performer might not work for another. It’s about feeling the rhythm of the music and translating that into visual form.
compositing and storytelling through sequences
Since you might not always get the perfect single shot, consider how multiple images can be used together to tell a more complete story. This could involve shooting a series of expressions from a musician, capturing the evolution of a drum solo, or even creating a diptych or triptych by combining different shots from the same moment. Post-processing tools can help you stitch these together or create visually engaging layouts.
Another advanced technique is to think about layering: capturing elements in the foreground (like hands, phone screens, or parts of the audience) to frame the performer in the midground, with stage lights creating a dynamic background. This adds depth and a sense of immersion. While not exactly compositing, it involves composing with multiple visual layers simultaneously.
Consider using:
- Sequential Photography: Capture a series of moments to show action or emotion over time.
- Layered Compositions: Utilize foreground elements (audience, hands) to frame and add context to your main subject.
- Post-Production Collages: Combine several related images into a single, compelling narrative piece.
By thinking beyond the single frame and considering how an entire series of images or even intentional blurs can convey the concert experience, you unlock powerful creative opportunities. These advanced techniques help you produce unique and memorable concert photography, proving that a press pass is less about access and more about vision. Your perspective from the crowd can offer an intimacy and authenticity that “official” shots sometimes lack.
| Key Point | Brief Description |
|---|---|
| 📸 Low Light Gear | Prioritize fast prime lenses (f/1.8, f/1.4) and cameras with strong high-ISO performance for clear, bright images in dim venues. |
| 💡 Master Settings | Use Aperture Priority, high ISO, fast shutter speeds (1/200s+), and continuous autofocus to adapt to dynamic stage lighting. |
| 👥 Strategic Positioning | Arrive early, find unobtrusive spots near the soundboard, and respect venue rules and fellow concert-goers’ views. |
| 🎨 Post-Processing | Crucial for noise reduction, color correction, and enhancing images to achieve a professional, polished look. |
frequently asked questions about concert photography
The best camera is one with excellent high-ISO performance and a relatively discrete size. Full-frame mirrorless cameras (e.g., Sony A7 series, Canon R series) are superb, but even APS-C mirrorless (e.g., Fujifilm XT series) or older DSLRs can perform well, especially when paired with fast lenses. Prioritize low-light capability over sheer mega-pixels.
Venue policies vary greatly. Many venues restrict lenses over 3 or 4 inches in length for uncredentialed photographers. Always check the specific venue’s rules before attending. It’s often safer to stick with compact, fast prime lenses to avoid issues, as larger lenses might be confiscated or lead to ejection.
To combat low light, use a wide-aperture lens (f/1.8 or f/2.8), push your ISO as high as your camera can handle without excessive noise (e.g., 3200-6400+), and maintain a fast enough shutter speed to freeze motion (1/200s or faster). In post-processing, judiciously apply luminance and color noise reduction to clean up images.
Key settings include Aperture Priority mode (Av/A) with your widest aperture, a high ISO (to compensate for low light), and a fast shutter speed (to freeze motion). Use continuous autofocus (AF-C/AI Servo) with a single focus point on the performer. Shoot in RAW for maximum flexibility in post-processing, especially for white balance.
Absolutely not. Using flash during a concert is highly discouraged. It’s disruptive and disrespectful to the performers and other audience members, and it typically produces harsh, unflattering light that ruins the atmosphere of the show. Rely solely on available stage lighting and your camera’s low-light capabilities.
conclusion
Capturing professional-quality concert photographs without a press pass is not just a dream, but a tangible goal achievable through dedication, smart gear choices, and refined techniques. While access might be limited, your creative vision certainly isn’t. By mastering low-light settings, understanding venue dynamics, and embracing the art of stealth and patience, you can consistently produce stunning images that not only encapsulate the raw energy of live music but also tell your unique story from the heart of the crowd. The journey is as rewarding as the captured shots, transforming every concert into an opportunity to hone your craft and create lasting memories.


